CI/CD Pipeline Setup with GitHub Actions for iOS Project

#iOS App Development
Intro
What we have
- iOS modular project splitted into local SPM submodules.
What we gonna do
- Setup SwiftLint for static code analysis
- Setup Fastlane as a helper for different kinds of jobs
- Setup GitHub Actions CI/CD pipeline for running tests
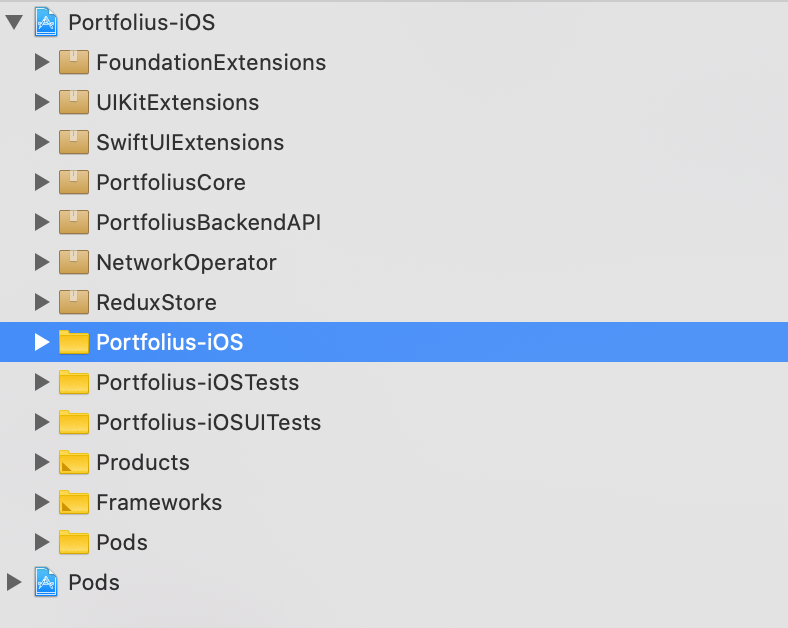
Project structure
Swift Package Manager
I've mentioned that the project is separated into local submodules with SPM as dependency manager.
Why splitting a project?
It enforces writing modular code that can be included later in other projects.
It's also scalable in case the team suddenly grows. Just imagine that the client suddenly hires 10 more devs and you have to organize their work in such a way they wouldn't interfere with each others work.
Why use local submodules instead of separate repos?
Separate repos bring overhead and hassle with pushing changes that you might want to avoid on early stages of active development of a project.
Local submodule is absolutely free. It acts like a local dir so you can change it easily. While it exists under git version control of the main project repo.
At the same time it's included in the main Xcode project as a fully-fledged separate package with all those public/internal access restrictions. So it can be moved to a separate repo at any time without any changes of the code.
Why do I still have XCWorkspace and Pods if I use SPM?
Unfortunately I still have to use CocoaPods to install SwiftLint in the most convenient way.
Local SPM modules
How to add local SPM modules?
- Xcode -> New -> Swift Package -> Add to workspace and project
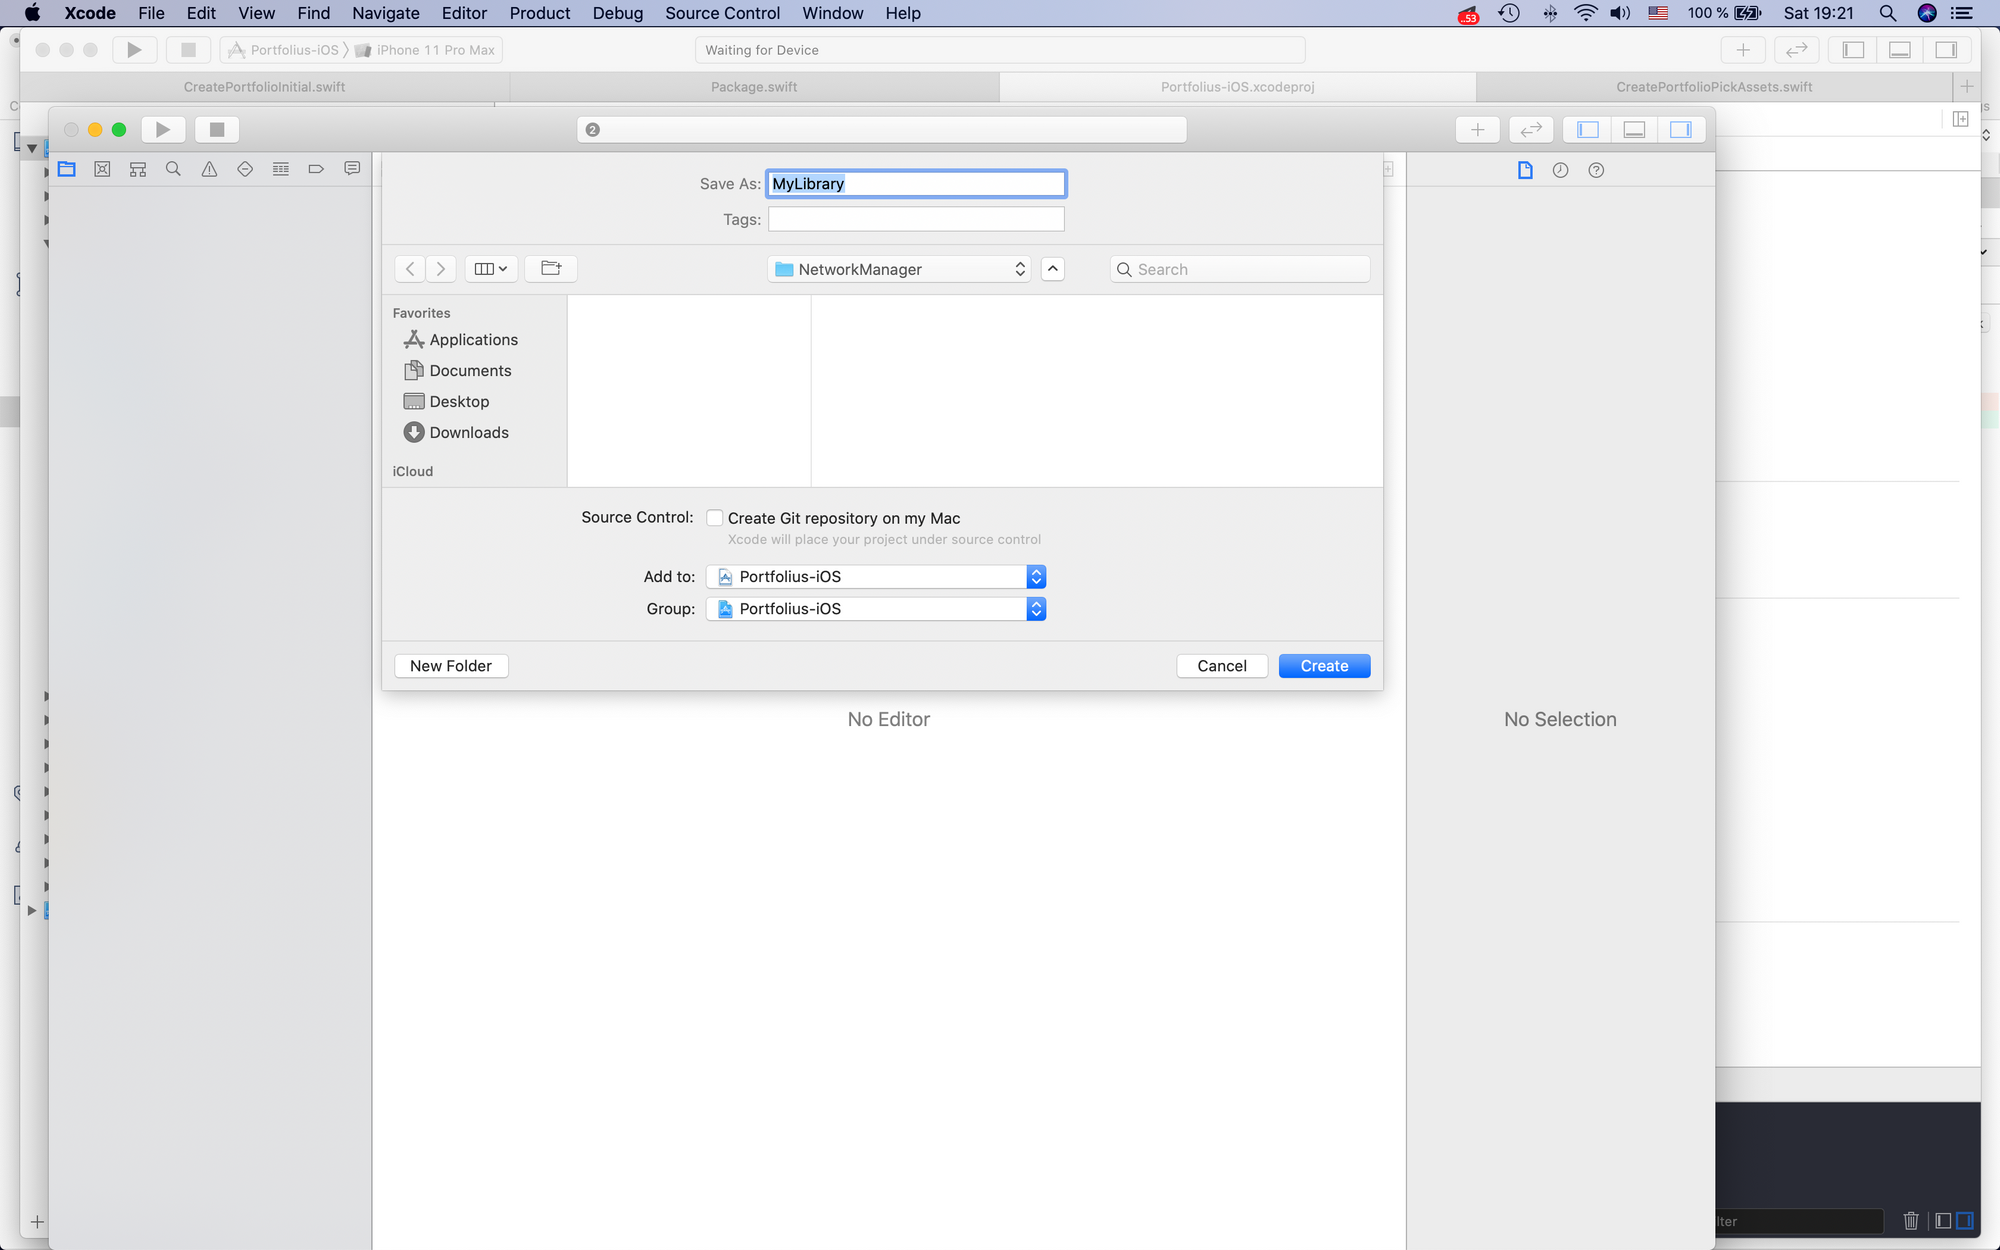
- Project settings -> Targets -> General -> Frameworks, Libraries -> Add your package here
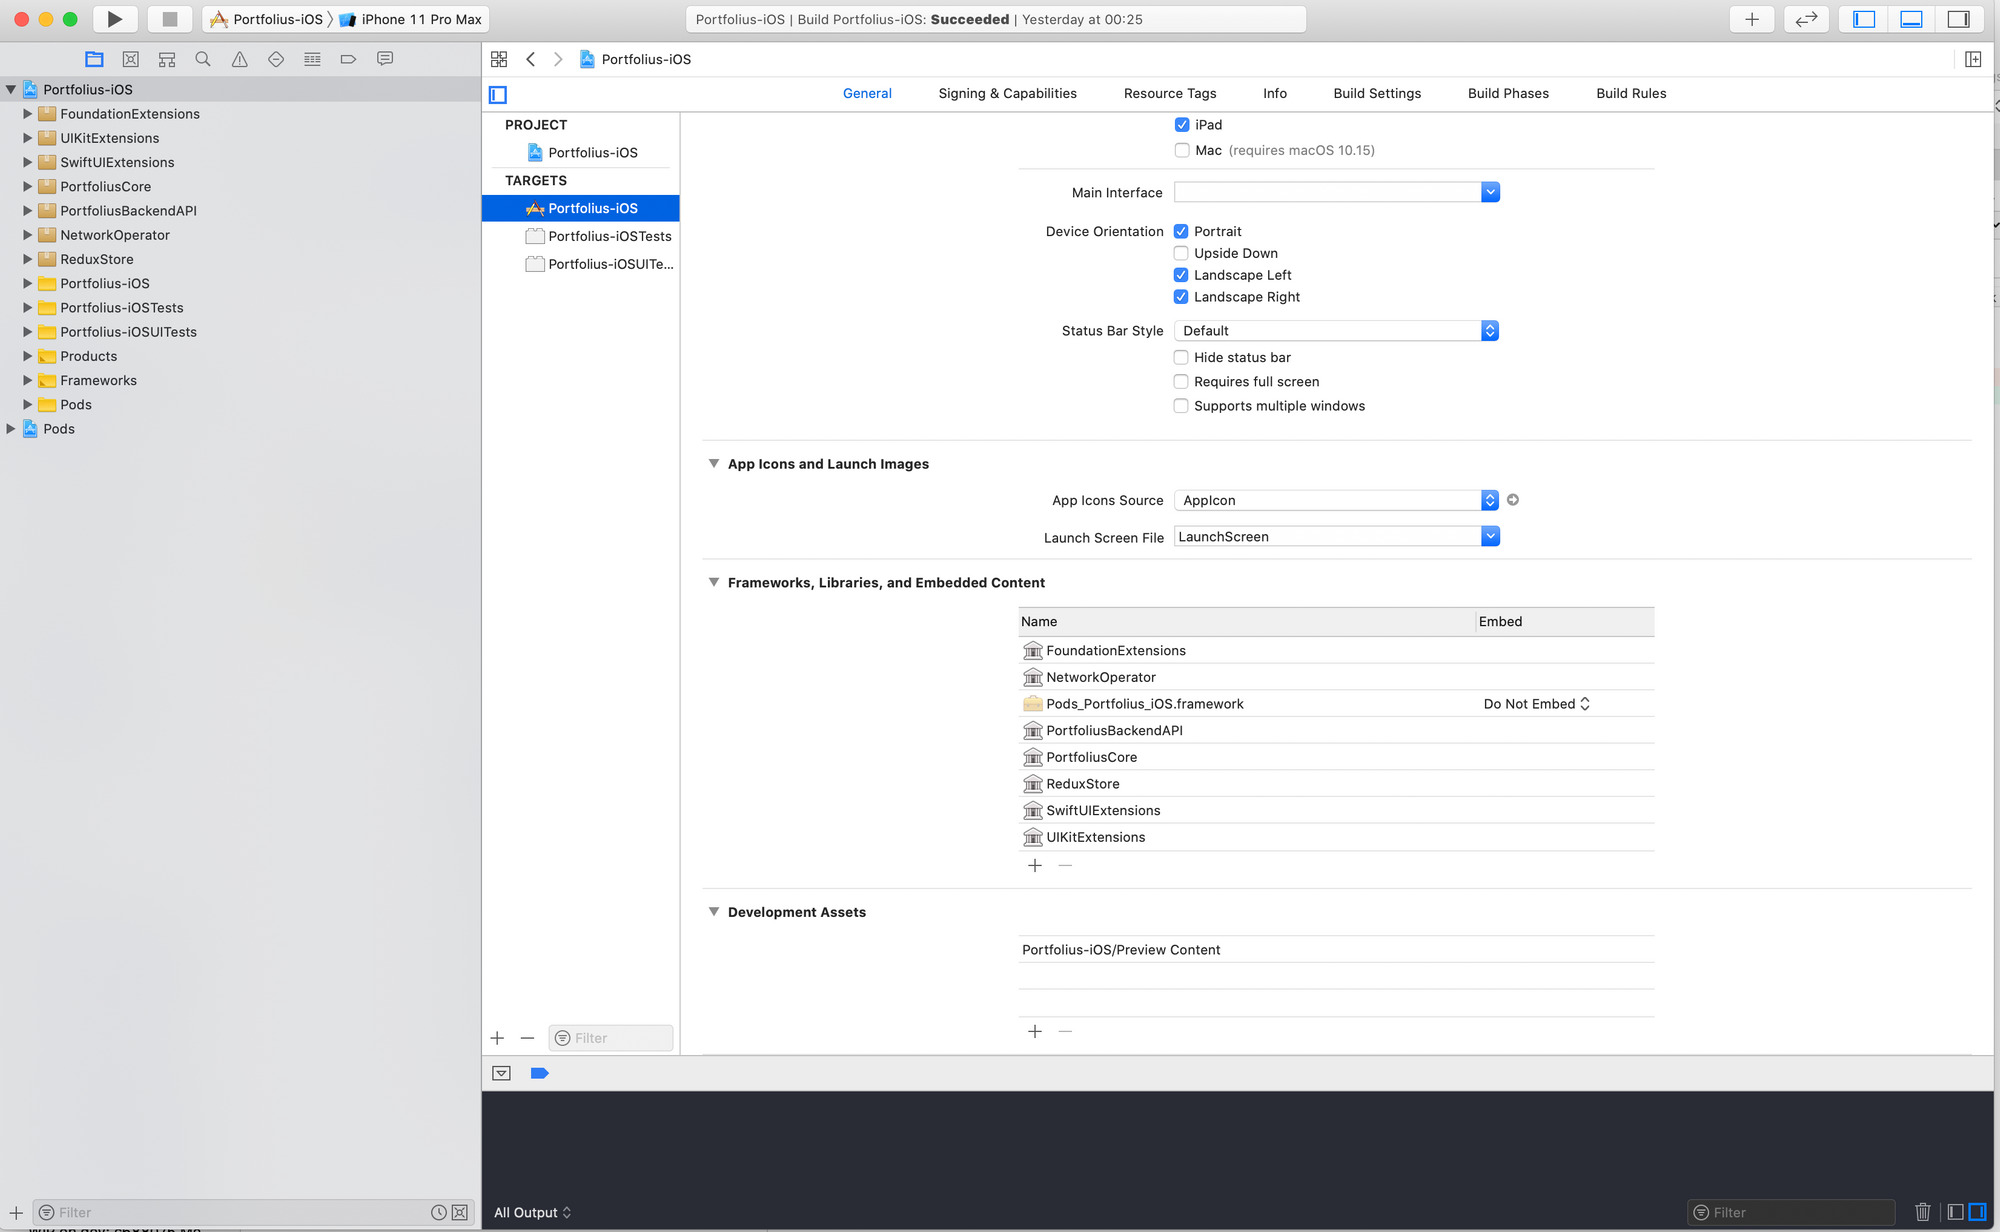
SwiftLint
In fact we will run SwiftLint from two places:
- Locally, during our local development process. Every time right before the project is built using build phase script.
- Remotely, on our CI/CD server using Fastlane
Installation
There are several ways to install SwiftLint including local installation via brew.
CocoaPods installation actually installs binary with dependencies, not the source code of it. It's preferable way or installation as it will allow to use the same SwiftLint version locally for all team members and run the same binary on CI/CD server as well.
Based on official docs, installation is as simple as
- Add a line to a Podfile:
pod 'SwiftLint'
2. Go to Project -> Targets -> Build Phases and add a phase run script (slightly different from the official docs):
if [ -z "$CI" ]; then
    ${PODS_ROOT}/SwiftLint/swiftlint
fi
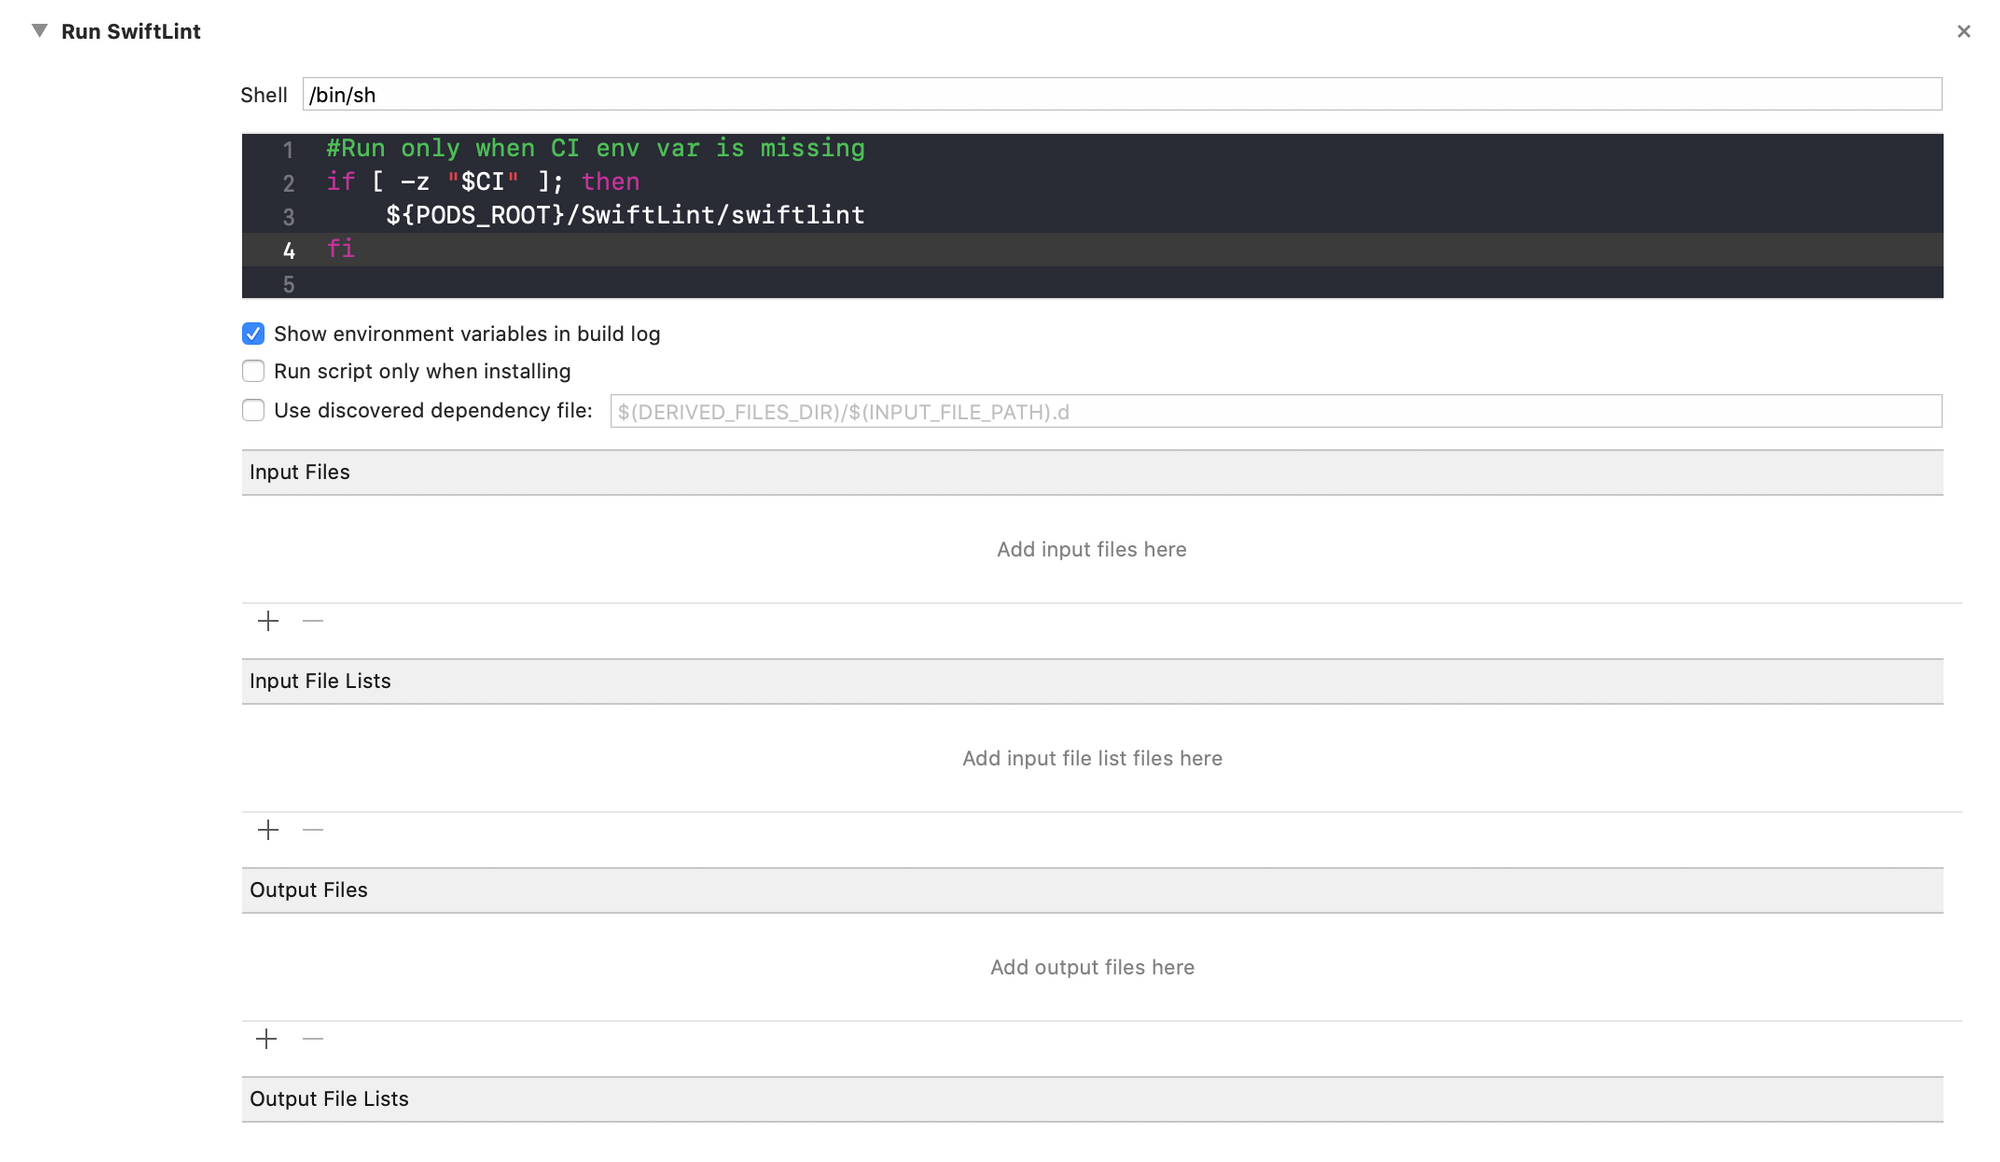
It will run the script only in if "CI" argument is missing. So SwiftLint build script will run locally before the build, but will be skipped on CI server.
UPD: Actually, it's not that easy because CI env vars are not accessible at this point. To pass env vars to build phase script on CI check this article.
3. Add .swiftlint.yml config file to the root project dir (where you've got .xcodeproj file). That's the dir SwiftLint will be launched from.
In .swiftlint.yml config file we can include or exclude our SPM local packages as well:
# By default, SwiftLint uses a set of sensible default rules you can adjust:
#disabled_rules: # rule identifiers turned on by default to exclude from running
#  - colon
#  - comma
#  - control_statement
#opt_in_rules: # some rules are turned off by default, so you need to opt-in
#  - empty_count # Find all the available rules by running: `swiftlint rules`

# Alternatively, specify all rules explicitly by uncommenting this option:
# whitelist_rules: # delete `disabled_rules` & `opt_in_rules` if using this
#   - empty_parameters
#   - vertical_whitespace

included: # paths to include during linting. `--path` is ignored if present.
  - Portfolius-iOS
  - PortfoliusCore
  - NetworkOperator
  - ReduxStore
  - PortfoliusBackendAPI
  - SwiftUIExtensions
  - UIKitExtensions
  - FoundationExtensions
excluded: # paths to ignore during linting. Takes precedence over `included`.
  - Carthage
  - Pods
  - Source/ExcludedFolder
  - Source/ExcludedFile.swift
  - Source/*/ExcludedFile.swift # Exclude files with a wildcard
analyzer_rules: # Rules run by `swiftlint analyze` (experimental)
  - explicit_self

# configurable rules can be customized from this configuration file
# binary rules can set their severity level
force_cast: warning # implicitly
force_try:
  severity: warning # explicitly
# rules that have both warning and error levels, can set just the warning level
# implicitly
line_length: 110
# they can set both implicitly with an array
type_body_length:
  - 300 # warning
  - 400 # error
# or they can set both explicitly
file_length:
  warning: 500
  error: 1200
# naming rules can set warnings/errors for min_length and max_length
# additionally they can set excluded names
type_name:
  min_length: 4 # only warning
  max_length: # warning and error
    warning: 40
    error: 50
  excluded: iPhone # excluded via string
  allowed_symbols: ["_"] # these are allowed in type names
identifier_name:
  min_length: # only min_length
    error: 3 # only error
  excluded: # excluded via string array
    - id
    - URL
    - GlobalAPIKey
reporter: "xcode" # reporter type (xcode, json, csv, checkstyle, junit, html, emoji, sonarqube, markdown, github-actions-logging)
4. We can add SwiftLint binary to .git repo. So SwiftLint will be available right after cloning of the repo and there will be no need to run Pod Install again. That's rather handy for onboarding new team members.
Fastlane
We will setup several lanes for later use in our CI/CD pipeline jobs.
Initial setup
Just go to official docs iOS section and perform the setup.
I decided to try fastlane swift, which is almost the same with only difference that it allows to write FastFile in swift. And it's in beta now.
So according to the Fastlane swift docs:
- Run init command in project dir:
fastlane init swift
2. Then open newly created fastlane's xcode project:
[project]/fastlane/swift/FastlaneRunner/FastlaneRunner.xcodeproj
And here we are. There is a Fastfile.swift - a place for defining your lanes.
Create lanes
Now we will create several lanes that we will later use as separate jobs.
- SwiftLint Lane
We will run it at the very beginning before we build the project
 func swiftLintLane() {
        desc("Run SwiftLint")
        swiftlint(configFile: ".swiftlint.yml",
                  strict: true,
                  ignoreExitStatus: false,
                  raiseIfSwiftlintError: true,
                  executable: "Pods/SwiftLint/swiftlint"
        )
    }
It's strict so it doesn't allow warnings and it fails the whole job if swift lint doesn't like your code.
- Build Lane
It will run next and will only build the project, without doing anything else. Its result will be an artifact that will be used further in test-related jobs.
Doing like this we can build once as a blocking task and then only run test-related jobs in parallel.
As you might have noticed, it passes "CI=true" as xcargs, so it will switch off our build phase SwiftLint run script that we configured before. We just don't need to run it twice.
 func buildLane() {
        desc("Build for testing")
        scan(workspace: "Portfolius-iOS.xcworkspace",
             derivedDataPath: "derivedData",
             buildForTesting: true,
             xcargs: "CI=true")
    }
- Unit tests Lane
In my case, PortfoliusCore contains redux actions, core components of the app with their reducers. So I consider them as unit tests of my project.
func unitTestLane() {
        desc("Run unit tests")
        scan(workspace: "Portfolius-iOS.xcworkspace",
             onlyTesting: ["PortfoliusCoreTests"],
             derivedDataPath: "derivedData",
             testWithoutBuilding: true)
    }
- Integration tests Lane
According to the project structure, the app itself depends on other SPM modules, combining them all together, so I consider Portofius-iOSTests to be integration tests of the project.
func integrationTestLane() {
        desc("Run integration tests")
        scan(workspace: "Portfolius-iOS.xcworkspace",
             onlyTesting: ["Portfolius-iOSTests"],
             derivedDataPath: "derivedData",
             testWithoutBuilding: true)
    }
- UI tests Lane
According to the project structure, app UI is implemented in the topmost project, so UI tests are also there.
 func uiTestLane() {
        desc("Run UI tests")
        scan(workspace: "Portfolius-iOS.xcworkspace",
             onlyTesting: "Portfolius-iOSUITests",
             derivedDataPath: "derivedData",
             testWithoutBuilding: true)
    }
Build Fastlane binary
Now we should build the binary for Fastlane. Just Cmd+B. Yeah that's the main difference between Swift and Ruby implementation. You have to rebuild to apply changes.
Add test targets of underlying SPM modules
Now we should add test targets of underlying SPM modules to the main project's test scheme.
Otherwise we simply won't be able to run tests for the underlying modules.
Note. Now we need to run tests for them, because this time, we added them as local SPM modules. Once we move them to a separate repo we might setup CI/CD there and won't need to run tests for them in the main project.
- Edit scheme:
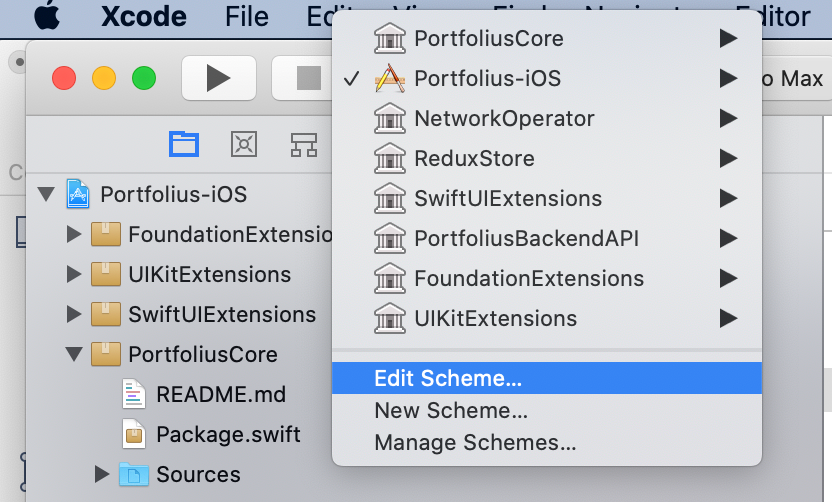
- Pick "Test" and add all required tests for the underlying SPM modules.

Pipelines are called workflows in Github Actions world. Now we will create the workflow that will use those lanes we defined on the previous step.
Our workflow will do the following:
- On pull request to master branch
- Run SwiftLintLane
- Run BuildLane and upload necessary results as artifacts
- Test jobs will start in parallel. Each of them will download required artifacts and run tests.
Jobs will be dependent on each other, so the next stage will start if previous finishes successfully.
Create workflow
Go to Actions -> New Workflow -> Setup new swift workflow

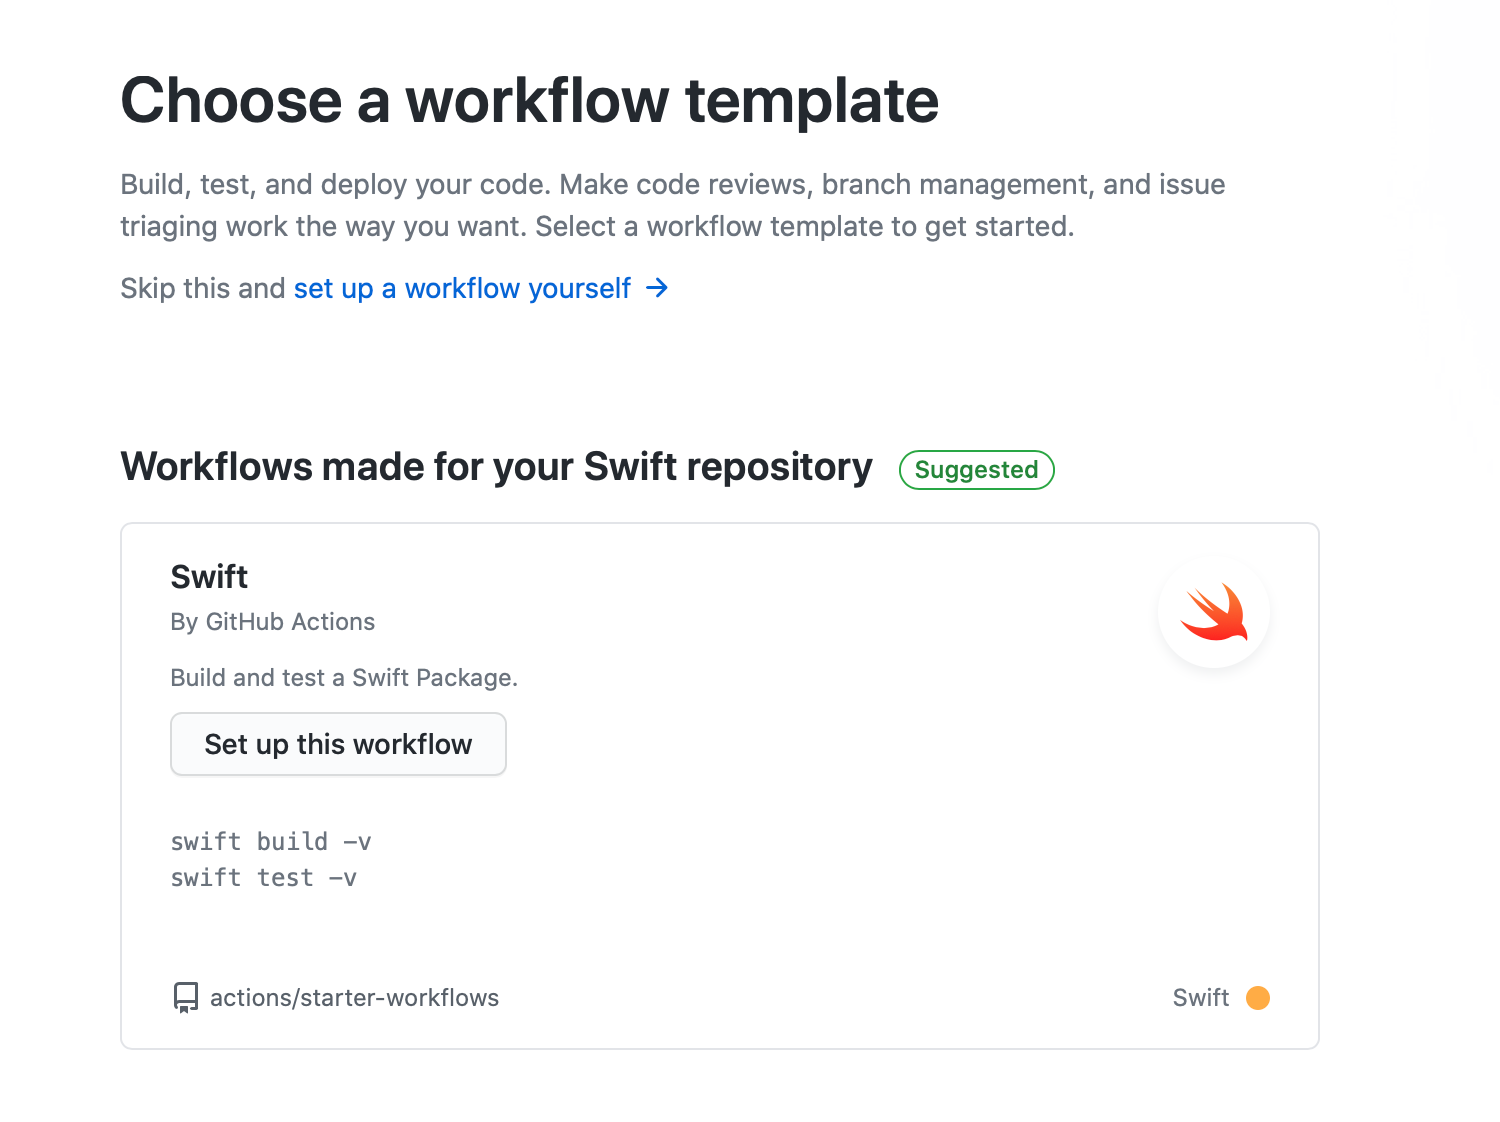
Now you will get something like workflow .yml editor with default config:
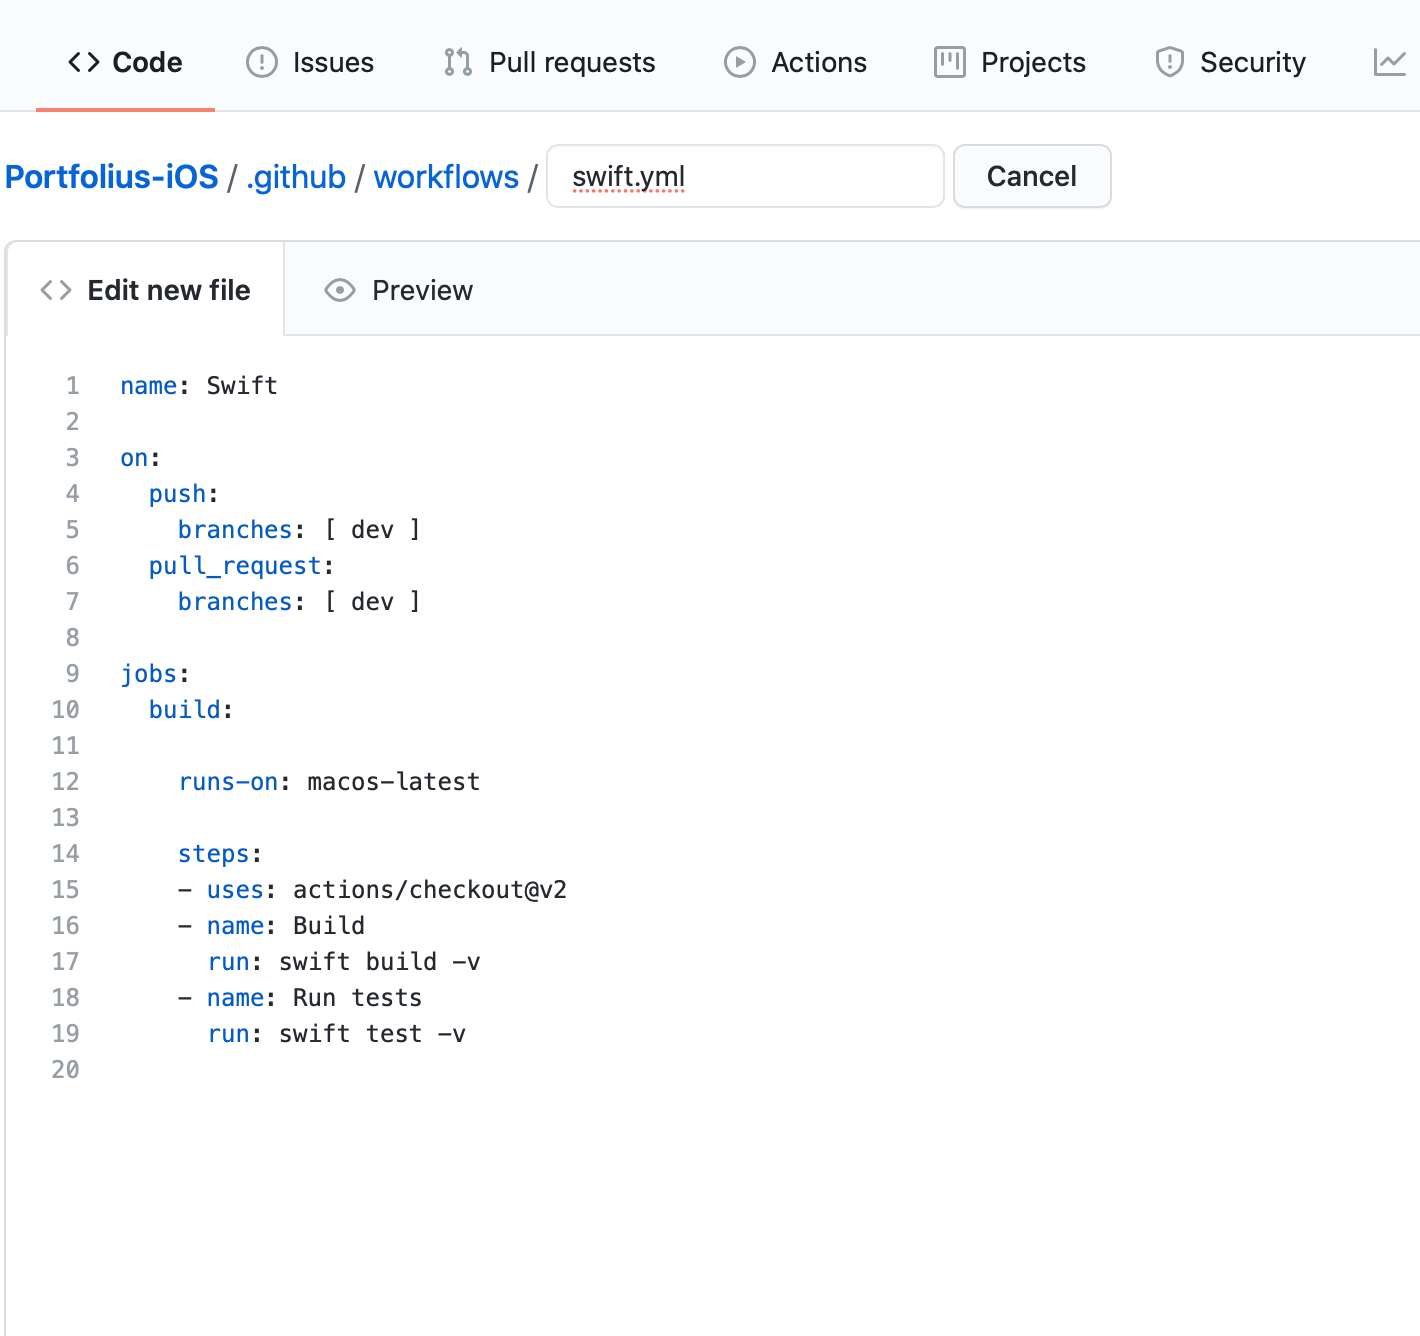
Workflow config
name: Swift

on:
  pull_request:
    branches: [ master ]

jobs:

  swiftLint:
    runs-on: macos-latest
    steps:
    - uses: actions/checkout@v2
    - name: Install Bundle
      run: bundle install
    - name: Run swiftlint
      run: bundle exec fastlane swiftLintLane

  build:
    needs: swiftLint
    runs-on: macos-latest
    steps:
    - uses: actions/checkout@v2
    - name: Install Bundle
      run: bundle install
    - name: Build
      run: bundle exec fastlane buildLane
    - name: Upload build
      uses: actions/upload-artifact@v2
      with:
        name: build
        path: derivedData/Build/Products/Debug-iphonesimulator/Portfolius-iOS.app
    - name: Upload Runner
      uses: actions/upload-artifact@v2
      with:
        name: runner
        path: derivedData/Build/Products/Debug-iphonesimulator/Portfolius-iOSUITests-Runner.app
    - name: Upload Core Tests
      uses: actions/upload-artifact@v2
      with:
        name: coreTests
        path: derivedData/Build/Products/Debug-iphonesimulator/PortfoliusCoreTests.xctest

  unitTests:
    needs: build
    runs-on: macos-latest
    steps:
    - uses: actions/checkout@v2
    - name: Download core tests
      uses: actions/download-artifact@v2
      with:
        name: coreTests
        path: derivedData/Build/Products/Debug-iphonesimulator/PortfoliusCoreTests.xctest
    - name: Install Bundle
      run: bundle install
    - name: Run unit tests
      run: bundle exec fastlane unitTestLane

  integrationTests:
    needs: build
    runs-on: macos-latest
    steps:
    - uses: actions/checkout@v2
    - name: Download build
      uses: actions/download-artifact@v2
      with:
        name: build
        path: derivedData/Build/Products/Debug-iphonesimulator/Portfolius-iOS.app
    - name: Install Bundle
      run: bundle install
    - name: Run integration tests
      run: bundle exec fastlane integrationTestLane

  uiTests:
    needs: build
    runs-on: macos-latest
    steps:
    - uses: actions/checkout@v2
    - name: Download build
      uses: actions/download-artifact@v2
      with:
        name: build
        path: derivedData/Build/Products/Debug-iphonesimulator/Portfolius-iOS.app
    - name: Download runner
      uses: actions/download-artifact@v2
      with:
        name: runner
        path: derivedData/Build/Products/Debug-iphonesimulator/Portfolius-iOSUITests-Runner.app
    - name: Install Bundle
      run: bundle install
    - name: Run ui tests
      run: bundle exec fastlane uiTestLane
Understanding workflow config
Defines the trigger for the workflow to start. Here we will run it on pull request to master branch. We can have different workflows with different set of jobs for different branches:
on:
  pull_request:
    branches: [ master ]
We run this step in every job because he's a required guy for Fastlane:
- name: Install Bundle
  run: bundle install
Means that the job depends on the job "swiftLint" and will wait for successful completion. If job fails, then all dependent jobs will be skipped:
needs: swiftLint
At build job we upload the build as artifact with name "build" using special github action "upload artifact". Btw, "derivedData" part of the path is the one we mentioned in our lanes as "derivedDataPath":
    - name: Upload build
      uses: actions/upload-artifact@v2
      with:
        name: build
        path: derivedData/Build/Products/Debug-iphonesimulator/Portfolius-iOS.app
We also upload UI Tests Runner. He is a guy, needed for running UI tests:
    - name: Upload Runner
      uses: actions/upload-artifact@v2
      with:
        name: runner
        path: derivedData/Build/Products/Debug-iphonesimulator/Portfolius-iOSUITests-Runner.app
And we also upload tests of underlying SPM module:
    - name: Upload Core Tests
      uses: actions/upload-artifact@v2
      with:
        name: coreTests
        path: derivedData/Build/Products/Debug-iphonesimulator/PortfoliusCoreTests.xctest
Test jobs are almost the same, so let's have a look at one of them:
uiTests:
    needs: build
    runs-on: macos-latest
    steps:
    - uses: actions/checkout@v2
    - name: Download build
      uses: actions/download-artifact@v2
      with:
        name: build
        path: derivedData/Build/Products/Debug-iphonesimulator/Portfolius-iOS.app
    - name: Download runner
      uses: actions/download-artifact@v2
      with:
        name: runner
        path: derivedData/Build/Products/Debug-iphonesimulator/Portfolius-iOSUITests-Runner.app
    - name: Install Bundle
      run: bundle install
    - name: Run ui tests
      run: bundle exec fastlane uiTestLane
- Download artifact named "build"
- Download "runner" for UI tests
- Install Fastlane bundle
- Run required lane
Protecting branches from failing code
Now we can go to repository settings -> branches and setup branch protection rules according to the docs.
We should add required status checks that won't allow to merge pull request that fails to pass all tests.
Next Steps
In order to sustain the gained success, we can take one the following tasks:
Prod build
- Create a new lane that will make a production build with bumped build version, then upload it to Testflight
- Add corresponding job to our github workflow for it, that will depend on our test jobs
Comments